Get started with 𝕏 AI and Grok
Grok is 𝕏‘s new foundational AI model. And as of today, you can get $25 in credits every month to build with it.
In this post, I’ll show you how to build a simple app with Grok and Vercel AI SDK. We’ll build a full-stack application using Astro, and deploy it to Cloudflare Pages. If you’re interested in seeing the full source code for what we build, check it out on GitHub.
Create a project
First, we’ll create a new project using the npm create cloudflare CLI - selecting the “Astro” framework:
$ npm create cloudflare@latest -- grok-starter --framework=astro
$ cd grok-starter
This will create a new project in the grok-starter directory.
Add Vercel AI SDK
Next, we’ll add the Vercel AI SDK and the 𝕏 AI Provider to our project.
$ npm install ai @ai-sdk/openai
Let’s define an API endpoint that we can use to call the AI model:
import { createOpenAI } from '@ai-sdk/openai';
import { generateText } from 'ai';

export async function POST({ locals, request }: any) {
  const apiKey = locals.runtime.env.XAI_API_KEY;

  if (!apiKey) return new Response('No API key provided', { status: 400 });

  const xai = createOpenAI({
    name: 'xai',
    baseURL: 'https://api.x.ai/v1',
    apiKey
  });

  try {
    const body = await request.json();

    if (!body || !body.prompt) {
      return new Response('No prompt provided', { status: 400 });
    }

    const prompt = body.prompt;

    const { text } = await generateText({
      model: xai('grok-beta'),
      prompt,
    });

    return new Response(text);
  } catch (error) {
    console.error(error);
    return new Response('Error generating text', { status: 500 });
  }
}
Note: this function is typed as any to simplify the tutorial. In the full code, the function is properly typed.
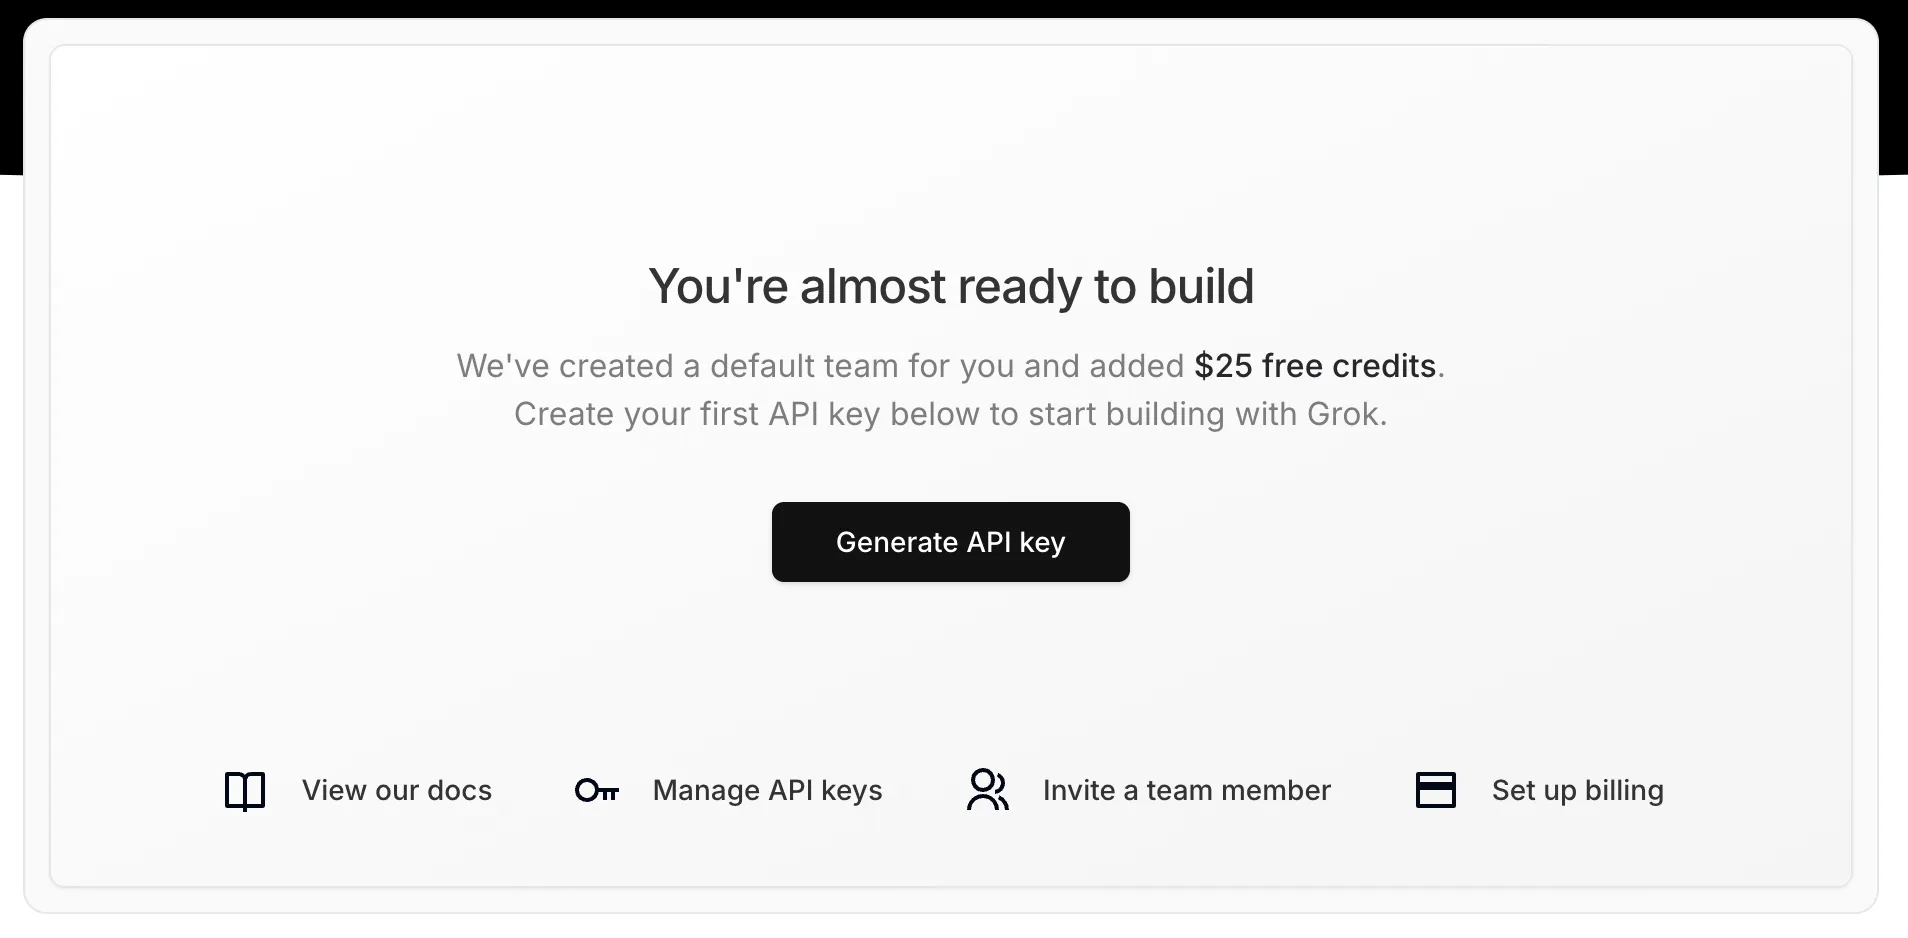
Get an API key
To use the Grok model, you’ll need an API key. You can get one by signing up for an account at console.x.ai. After you’ve confirmed your email address, you can generate an API key:
Add the API key to .dev.vars in the root of your project:
XAI_API_KEY="xai-$key"
Run locally
Now we can run the app locally:
$ npm run dev
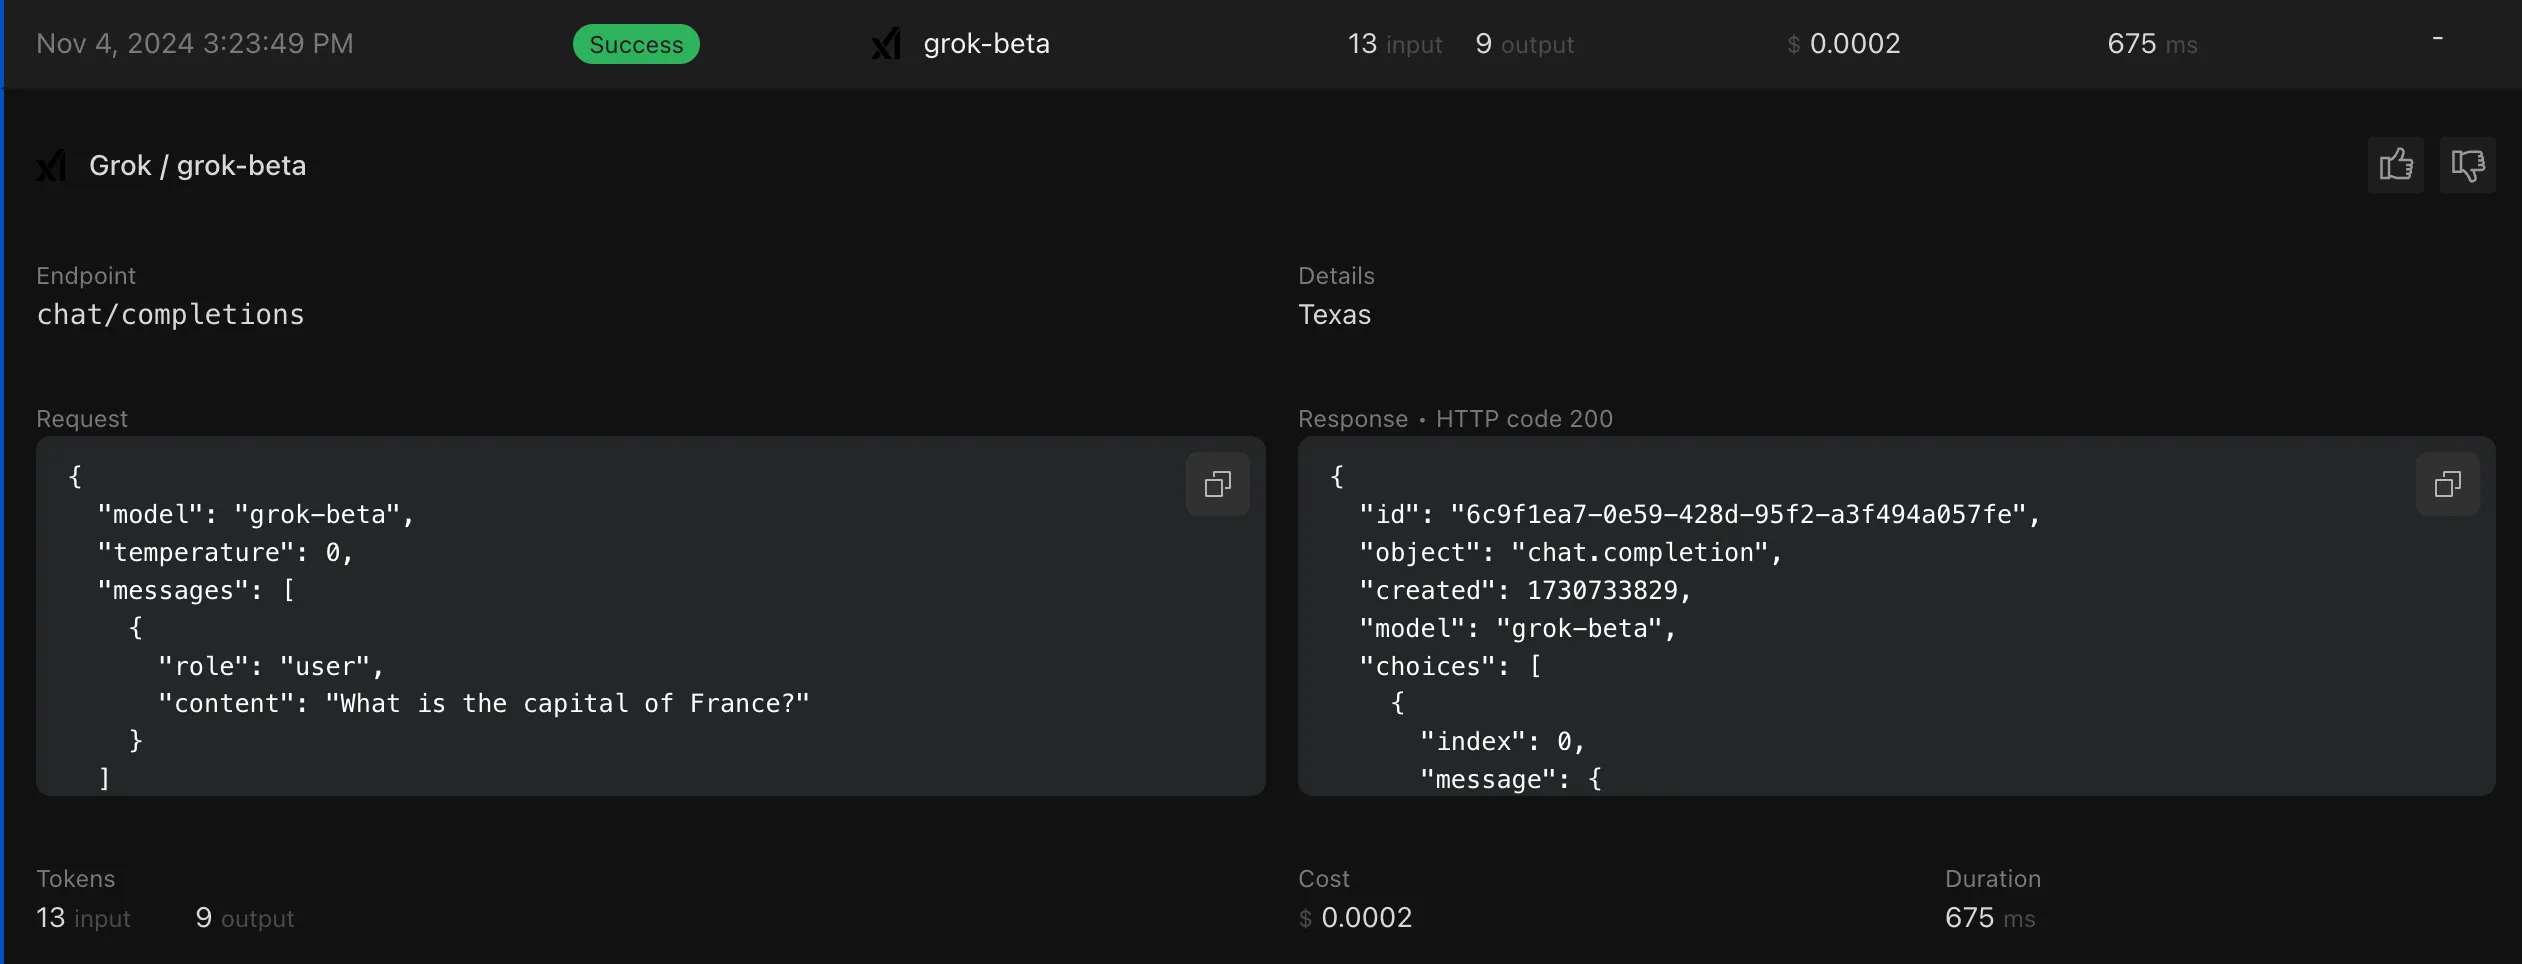
To generate our first text from Grok, we can send a POST request to the /api/generate endpoint1.
$ xh POST http://localhost:4321/api/generate prompt="What is the capital of France?"
"The capital of France is Paris."
Create a frontend interface
Now we can create a simple frontend interface to interact with our API. In src/pages/index.astro, we’ll replace the content generated by Astro with basic styling, and add a form with an input and a button:
<html lang="en">
  <head>
    <meta charset="utf-8" />
    <link rel="icon" type="image/svg+xml" href="/favicon.svg" />
    <meta name="viewport" content="width=device-width" />
    <meta name="generator" content={Astro.generator} />
    <title>Grok Starter</title>

    <style>
      body {
        font-family: system-ui, sans-serif;
        padding: 2rem;
      }

      form {
        display: flex;
        column-gap: 1rem;
      }

      input {
        width: 100%;
        padding: 0.5rem;
        font-size: 1rem;
        border-radius: 0.5rem;
        border: 1px solid #ccc;
      }

      button {
        padding: 0.5rem;
        font-size: 1rem;
        border-radius: 0.5rem;
        border: 1px solid #ccc;
        background-color: #ccc;
        cursor: pointer;
      }

      #grok-response {
        margin-top: 1rem;
        white-space: pre-wrap;
        word-wrap: break-word;
      }
    </style>
  </head>

  <body>
    <h1>Grok Starter</h1>
    <form id="form">
      <input type="text" id="input" placeholder="Enter your text here..." />
      <button type="submit">Generate</button>
    </form>
    <div id="grok-response"></div>
  </body>
</html>
This form will render, but submitting it won’t do anything. Let’s write a basic function that will take the text from the input and send it to our API endpoint:
<html lang="en">
  <head>
    <meta charset="utf-8" />
    <link rel="icon" type="image/svg+xml" href="/favicon.svg" />
    <meta name="viewport" content="width=device-width" />
    <meta name="generator" content={Astro.generator} />
    <title>Grok Starter</title>

    <style>
      body {
        font-family: system-ui, sans-serif;
        padding: 2rem;
      }

      form {
        display: flex;
        column-gap: 1rem;
      }

      input {
        width: 100%;
        padding: 0.5rem;
        font-size: 1rem;
        border-radius: 0.5rem;
        border: 1px solid #ccc;
      }

      button {
        padding: 0.5rem;
        font-size: 1rem;
        border-radius: 0.5rem;
        border: 1px solid #ccc;
        background-color: #ccc;
        cursor: pointer;
      }

      #grok-response {
        margin-top: 1rem;
        white-space: pre-wrap;
        word-wrap: break-word;
      }
    </style>
  </head>

  <body>
    <h1>Grok Starter</h1>
    <form id="form">
      <input type="text" id="input" placeholder="Enter your text here..." />
      <button type="submit">Generate</button>
    </form>
    <div id="grok-response"></div>
  </body>

  <script>
    const button = document
      .getElementById("form")!
      .querySelector("button[type='submit']") as HTMLButtonElement;
    const input = document.getElementById("input")! as HTMLInputElement;
    const grokResponse = document.getElementById(
      "grok-response",
    )! as HTMLDivElement;

    const generateText = async (text: string) => {
      input.disabled = true;
      button.disabled = true;
      button.innerHTML = "Generating...";

      const response = await fetch("/api/generate", {
        method: "POST",
        headers: {
          "Content-Type": "application/json",
        },
        body: JSON.stringify({
          prompt: text,
        }),
      });

      const output = await response.text();
      grokResponse.innerHTML = output;

      input.disabled = false;
      input.value = "";

      button.disabled = false;
      button.innerHTML = "Generate";
    };

    const form = document.getElementById("form")!;
    form.addEventListener("submit", async (event) => {
      event.preventDefault();
      await generateText(input.value);
    });
  </script>
</html>
The complete implementation looks like this:
<html lang="en">
  <head>
    <meta charset="utf-8" />
    <link rel="icon" type="image/svg+xml" href="/favicon.svg" />
    <meta name="viewport" content="width=device-width" />
    <meta name="generator" content={Astro.generator} />
    <title>Grok Starter</title>

    <style>
      body {
        font-family: system-ui, sans-serif;
        padding: 2rem;
      }

      form {
        display: flex;
        column-gap: 1rem;
      }

      input {
        width: 100%;
        padding: 0.5rem;
        font-size: 1rem;
        border-radius: 0.5rem;
        border: 1px solid #ccc;
      }

      button {
        padding: 0.5rem;
        font-size: 1rem;
        border-radius: 0.5rem;
        border: 1px solid #ccc;
        background-color: #ccc;
        cursor: pointer;
      }

      #grok-response {
        margin-top: 1rem;
        white-space: pre-wrap;
        word-wrap: break-word;
      }
    </style>
  </head>

  <body>
    <h1>Grok Starter</h1>
    <form id="form">
      <input type="text" id="input" placeholder="Enter your text here..." />
      <button type="submit">Generate</button>
    </form>
    <div id="grok-response"></div>
  </body>

  <script>
    const button = document
      .getElementById("form")!
      .querySelector("button[type='submit']") as HTMLButtonElement;
    const input = document.getElementById("input")! as HTMLInputElement;
    const grokResponse = document.getElementById(
      "grok-response",
    )! as HTMLDivElement;

    const generateText = async (text: string) => {
      input.disabled = true;
      button.disabled = true;
      button.innerHTML = "Generating...";

      const response = await fetch("/api/generate", {
        method: "POST",
        headers: {
          "Content-Type": "application/json",
        },
        body: JSON.stringify({
          prompt: text,
        }),
      });

      const output = await response.text();
      grokResponse.innerHTML = output;

      input.disabled = false;
      input.value = "";

      button.disabled = false;
      button.innerHTML = "Generate";
    };

    const form = document.getElementById("form")!;
    form.addEventListener("submit", async (event) => {
      event.preventDefault();
      await generateText(input.value);
    });
  </script>
</html>
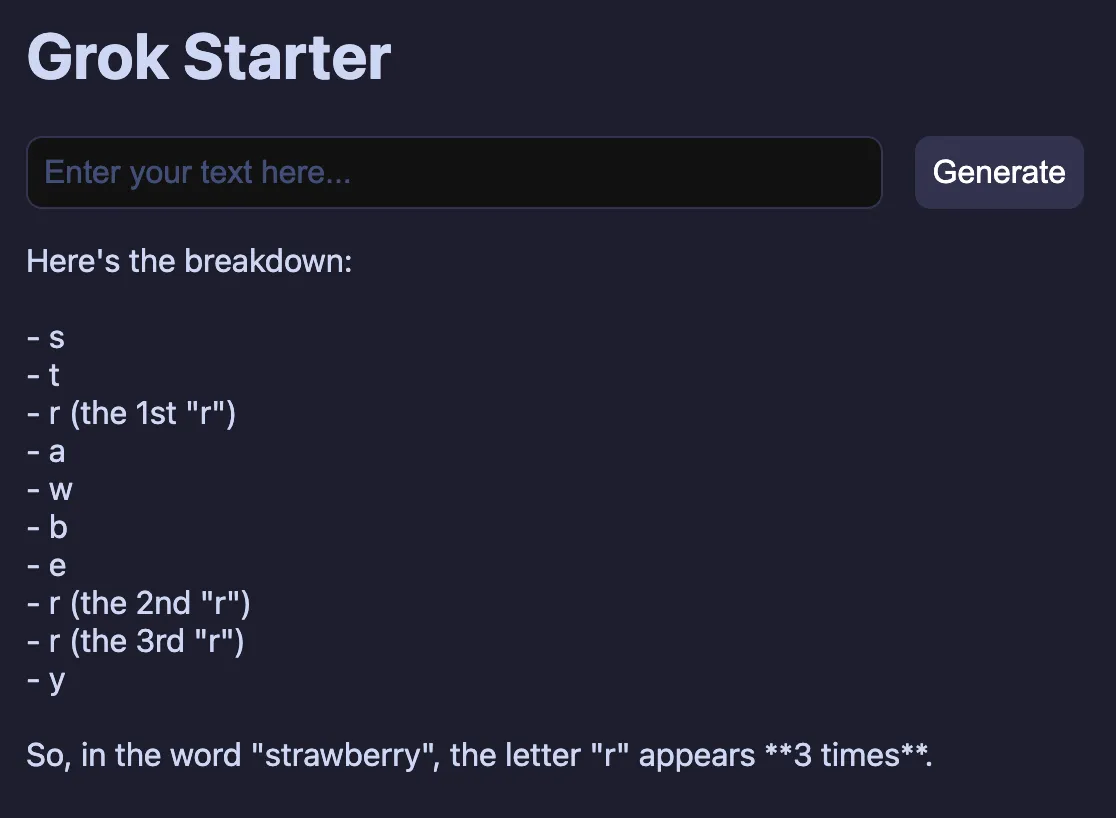
The final UI can accept prompts and generate responses:
Deployment
Now that the UI and endpoint work correctly, we can deploy the application. To do this, we’ll use Cloudflare Pages. This is a great way to deploy a static site, and it’s free for small projects.
If you haven’t created an account already, you can do so here. Once you’ve created your account, you’ll be able to create a new project.
Once you’ve created an account, you can authenticate with the CLI by running:
$ npx wrangler login
Finally, we can deploy our application by running:
$ npm run pages:deploy
This will build the site, and deploy it to Cloudflare Pages.
Before we can use it in production, we need to set up the 𝕏 API key that we generated earlier. To do this, run the following command:
$ npx wrangler pages secret put XAI_API_KEY
After setting the secret, you should deploy one more time, to ensure that the secret is available to your application:
$ npm run pages:deploy
After doing this, you can visit the site and test it out!
Securing with AI Gateway
We have one more trick up our sleeve. We can use Cloudflare AI Gateway to help protect our application from abuse. Since we’re essentially deploying an unprotected API endpoint that would allow anyone to use 𝕏 AI/Grok via our application, it would be easy for a malicious actor to use up all our credits!
AI Gateway allows you to protect your API endpoints from abuse. It works by rate-limiting requests, caching responses, and adding useful logging/analytics to your AI endpoints.
Here’s how to integrate it into your application:
- Enable AI Gateway by visiting the Dashboard and enabling it.
- Create a new AI Gateway by clicking the “Create Gateway” button.
- Select the “API” button, and find the “Grok” endpoint option
- Copy this value.
This AI Gateway endpoint is what we will proxy our AI requests through.
In the src/pages/api/openai.ts file, we’ll update the URL to use this endpoint:
import { createOpenAI } from '@ai-sdk/openai';
import { generateText } from 'ai';

export async function POST({ locals, request }: { locals: App.Locals; request: Request }) {
  const apiKey = locals.runtime.env.XAI_API_KEY;

  if (!apiKey) {
    return new Response('No API key provided', { status: 400 });
  }

  const baseURL = 'https://gateway.ai.cloudflare.com/v1/$accountId/grok-starter/grok';

  const xai = createOpenAI({
    name: 'xai',
    baseURL: 'https://api.x.ai/v1',
    baseURL
    apiKey
  });

  try {
    const body = await request.json();

    if (!body || !body.prompt) {
      return new Response('No prompt provided', { status: 400 });
    }

    const prompt = body.prompt;

    const { text } = await generateText({
      model: xai('grok-beta'),
      prompt,
    });

    return new Response(text);
  } catch (error) {
    console.error(error);
    return new Response('Error generating text', { status: 500 });
  }
}
Redeploy your application, and try issuing a request from the UI to your AI endpoint. You should begin seeing logs generated in the AI Gateway console.
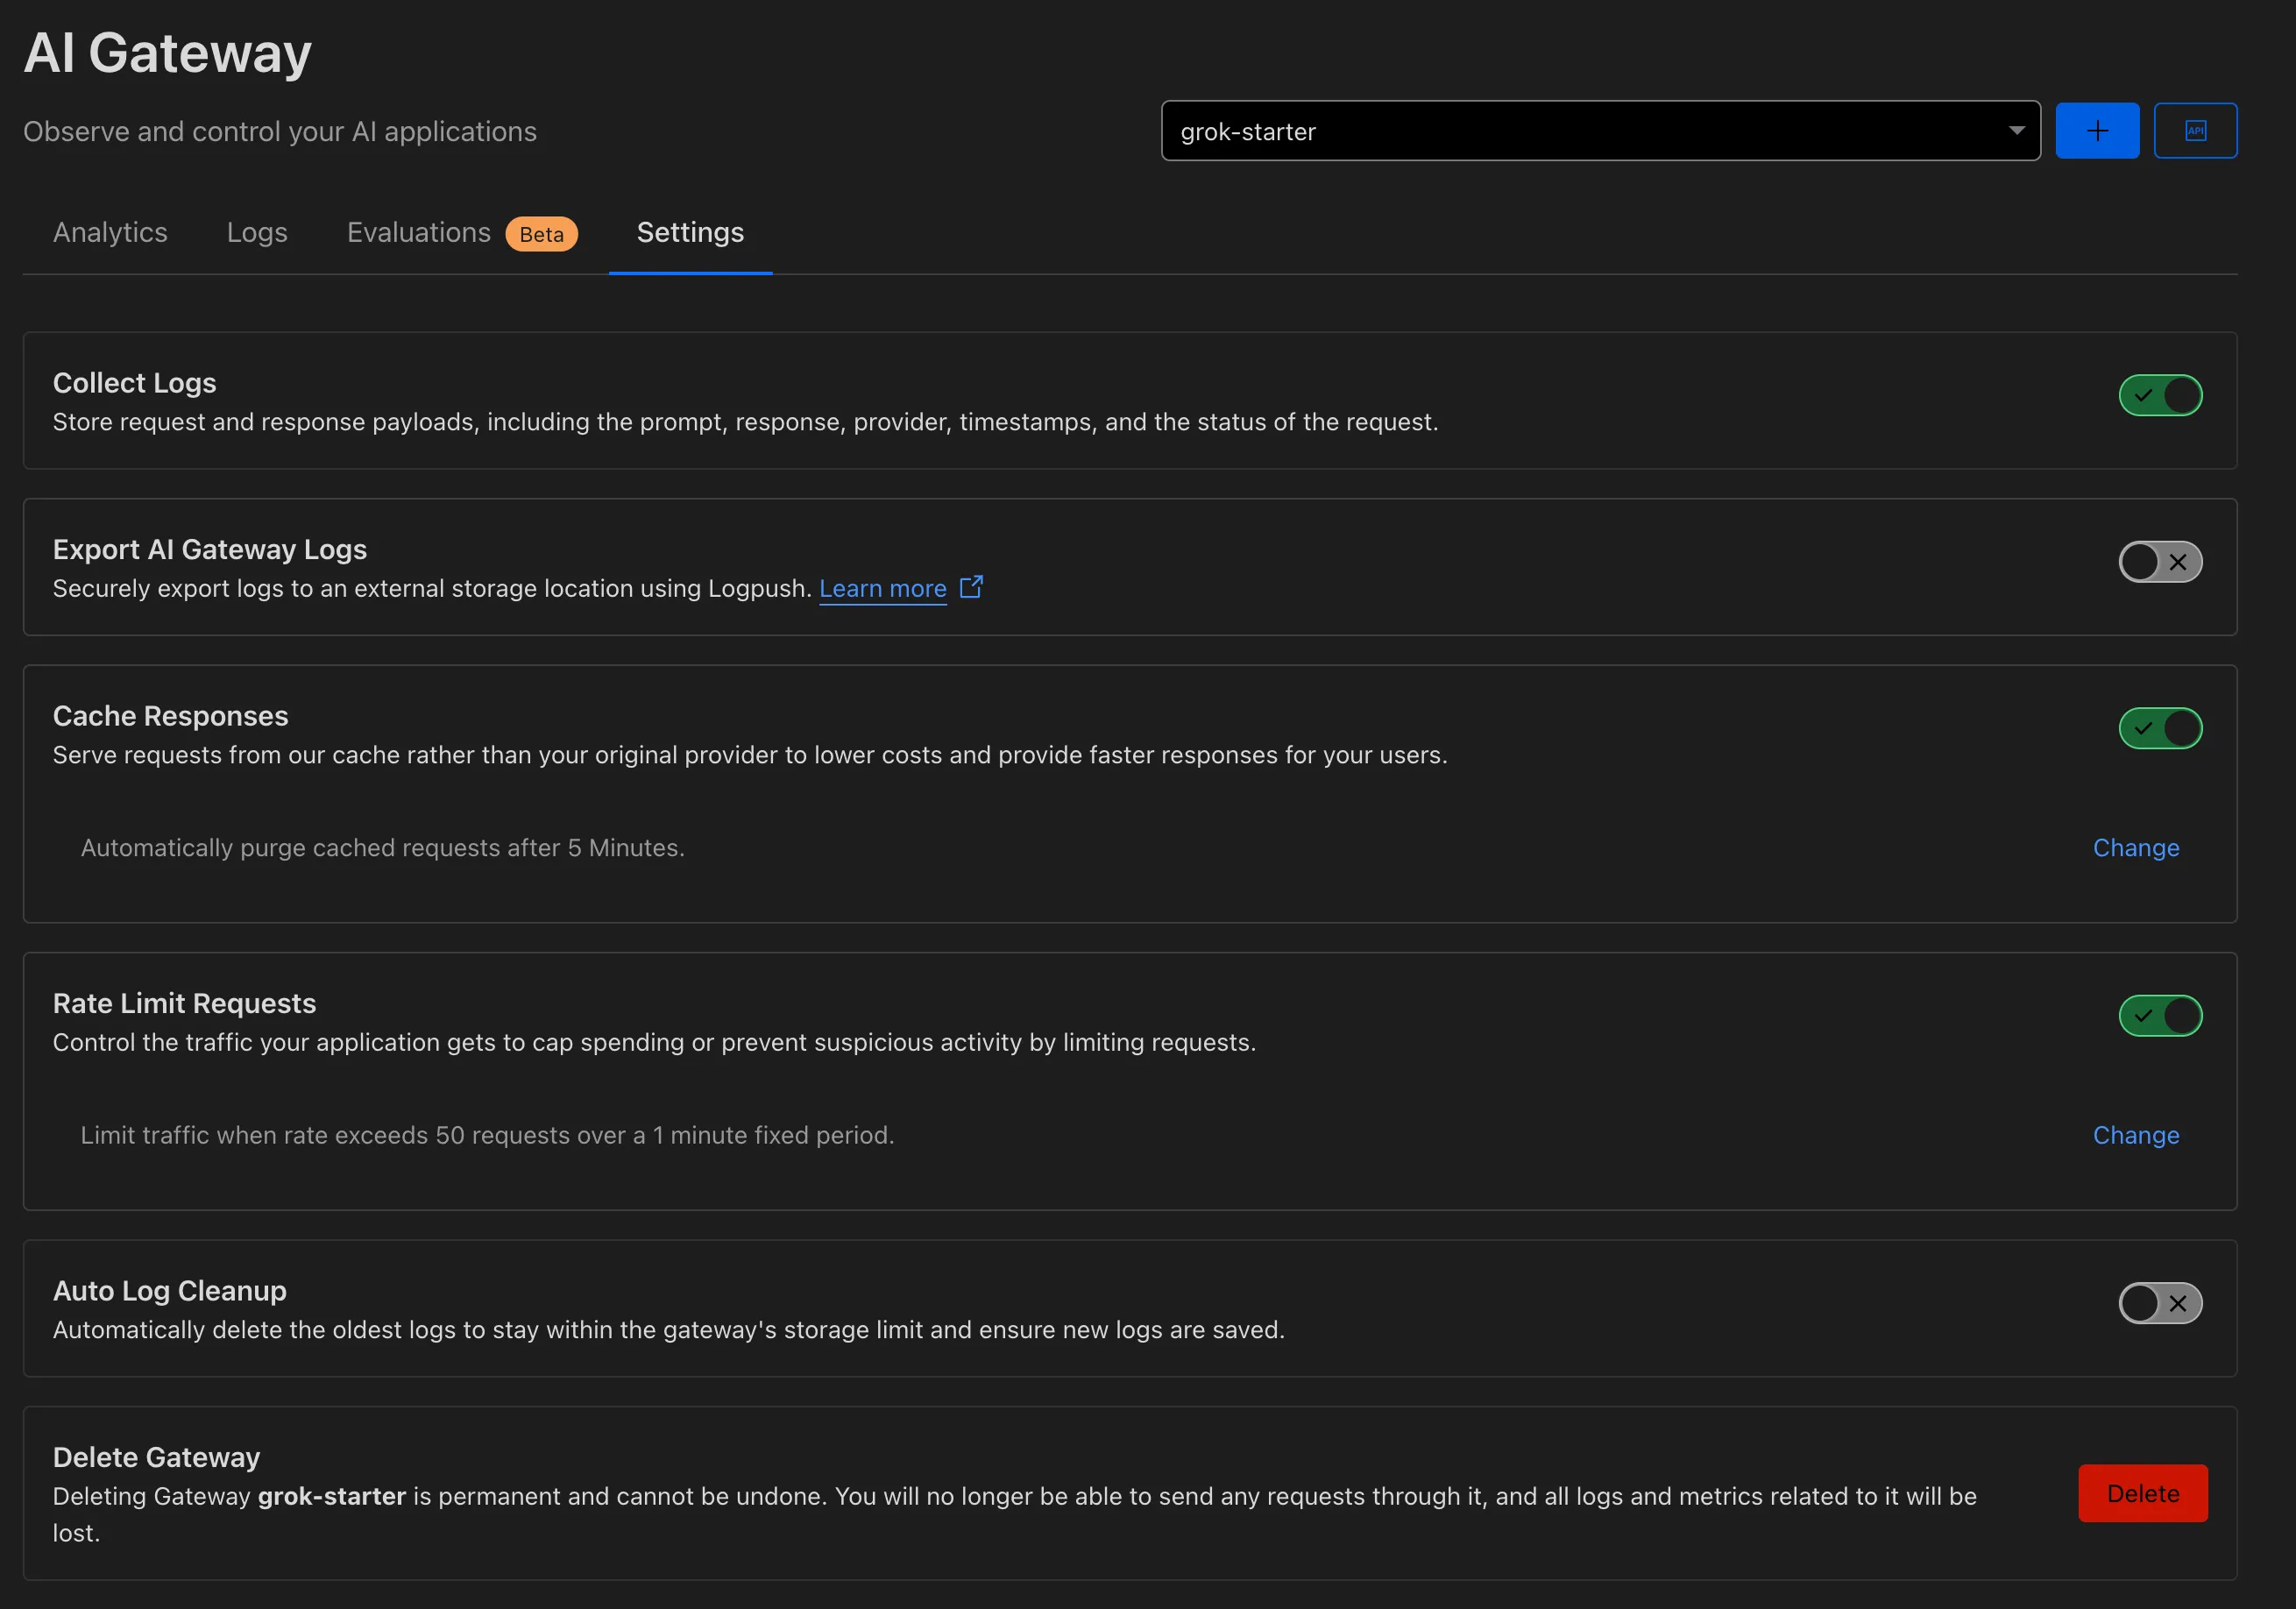
Finally, we can turn on a few settings to make AI Gateway securely protect our API endpoint:
- “Cache Responses”. This will cache any response from Grok that matches a previous prompt.
- “Rate Limit Requests”. This will limit the number of requests that can be made to the API endpoint from any given IP address. You can tweak this to be, for instance, 10 requests per minute.
Conclusion
I’m impressed with 𝕏 AI and the Grok model! It’s pretty smart, and it’s easy to integrate into applications. The $25 free monthly credit they’ve announced is awesome, and I’m excited to keep building with it. In the blog post, they mention support for tool calling and system prompts. This will probably get integrated into Vercel SDK AI soon, so it will be another great model to have in the toolbelt while building AI apps.
If you’re interested in seeing the full source code for this project, check it out on GitHub!